1.2.4. WIRING COMPONENTS
When data is not stored in the permanent record set of a parameter, it must be inherited from elsewhere. Data is passed from one component to another through wires. You can think of them literally as electrical wires that carry pulses of data from one object to the next.
1.2.4.1. CONNECTION MANAGEMENT
To connect components, click and drag near the circle on the output side of an object. A connecting wire will be attached to the mouse. Once the mouse hovers over a potential target input, the wire will connect and become solid. This is not a permanent connection until you release the mouse button. It doesn’t matter if we make the connections in a ‘left to right’ or ‘right to left’ manner.

- The Divide Curve component - divides a curve into equal length segments.
- Curve parameter - right click and select Set One Curve to reference Rhino Geometry.

Left click and drag the wire from the output (1.) of one object to the input (2.) of another.

- If you hold down CONTROL, the cursor will become red, and the targeted source will be removed from the source list.
- By default, a new connection will erase existing connections. Hold the SHIFT button while dragging connection wires to difne multiple sources. The cursor will turn green to indicate the addition behavior.

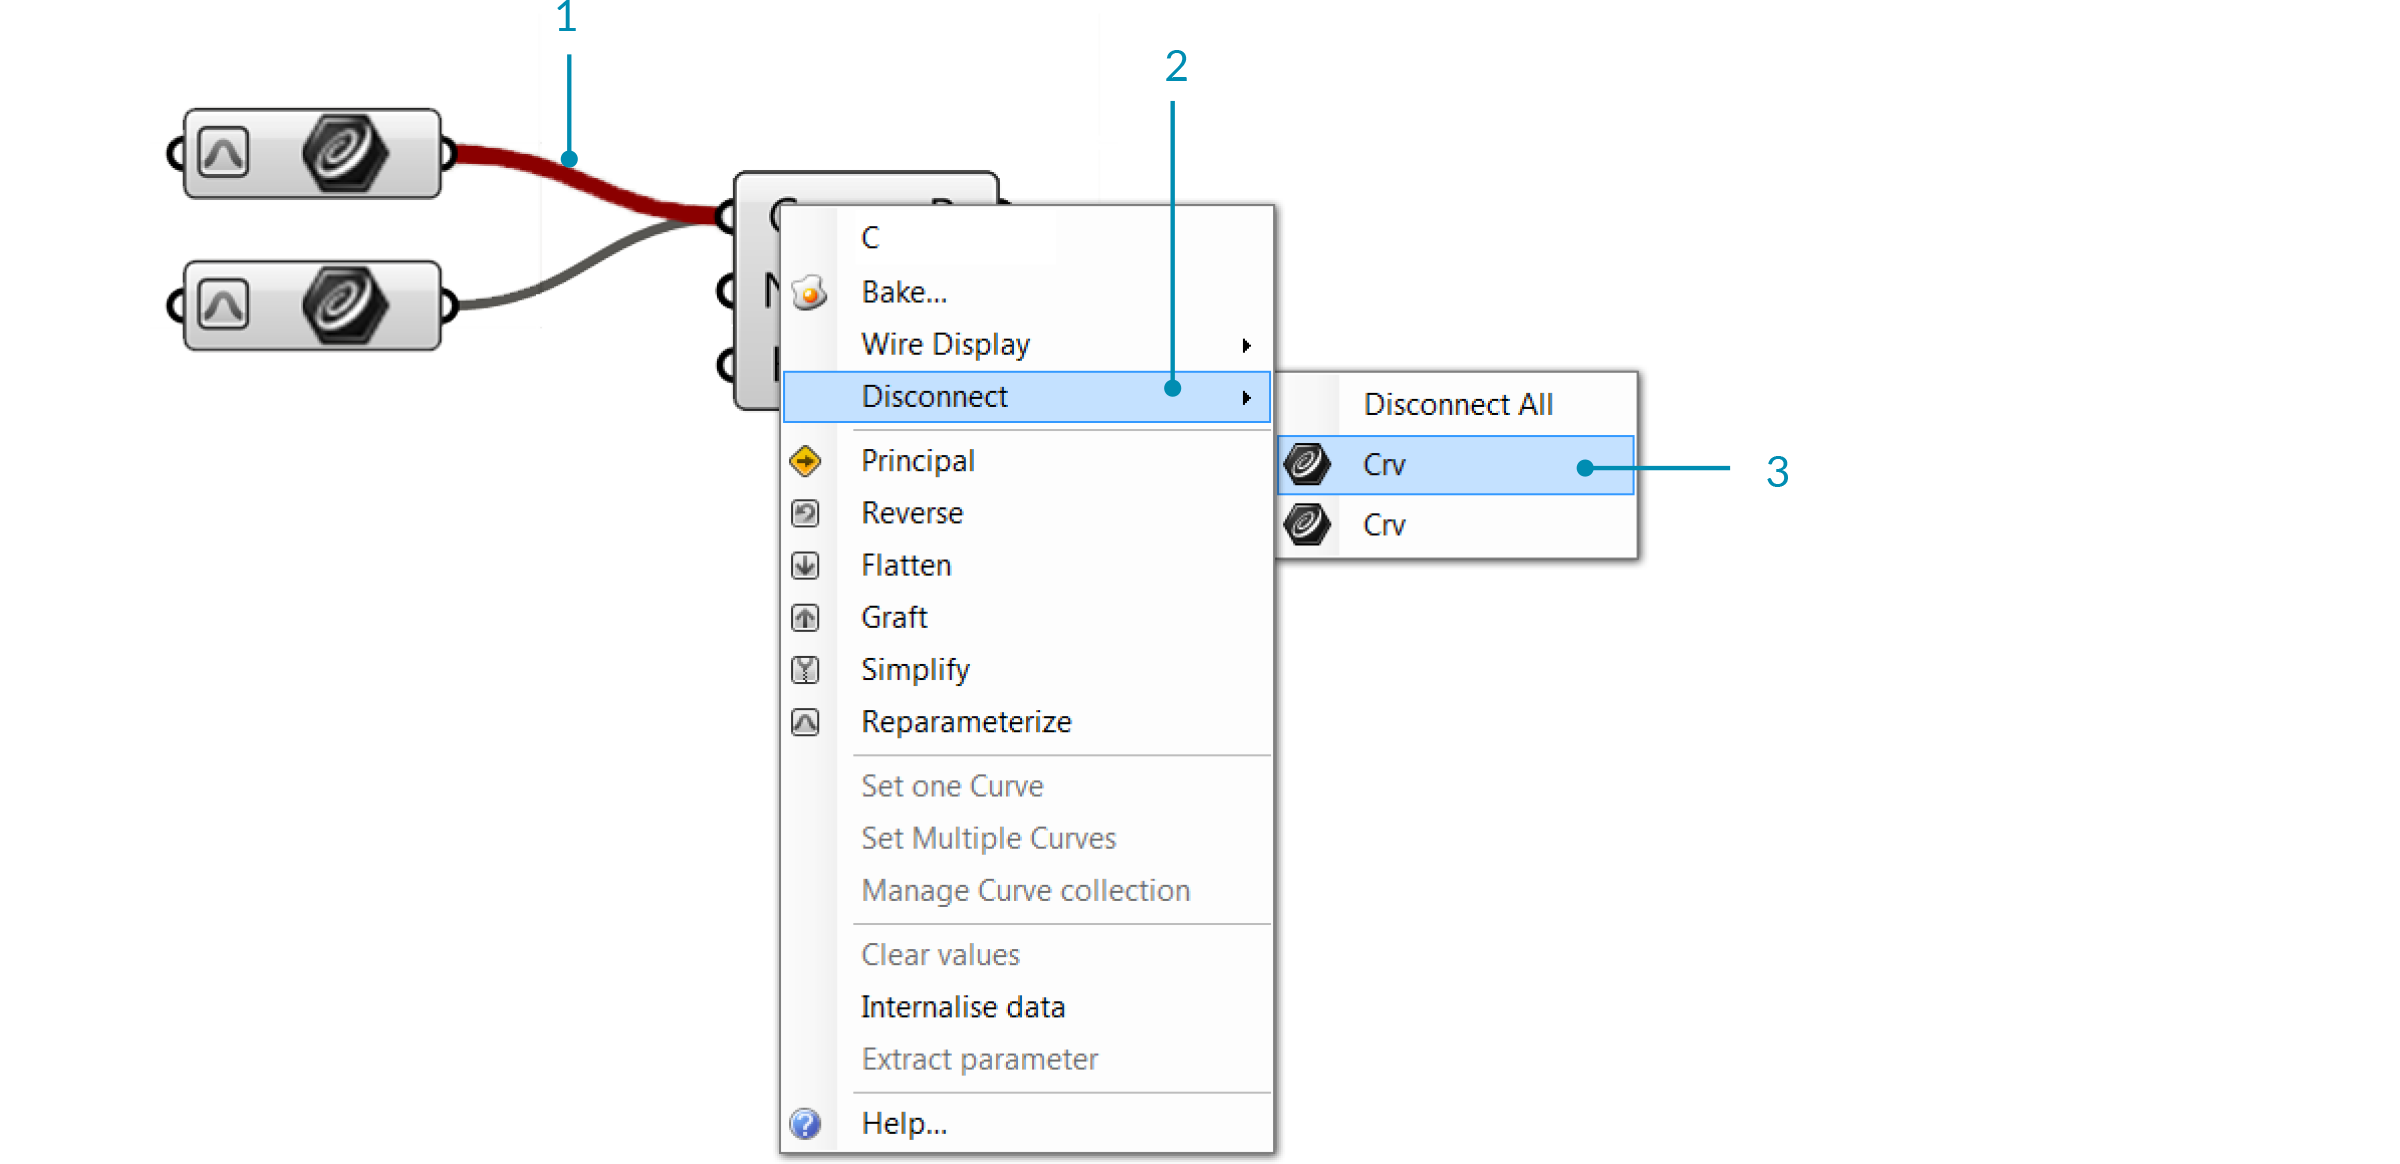
- You can also disconnect wires through the context popup menu - right click the grip of the input or output and select disconnect.
- If there are multiple connections, select the one you want to disconnect from the list.
- When you hover over an item, the wire will be highlighted in red.
1.2.4.2. FANCY WIRES
Wires represent the connections as well as the flow of data within the graph in our definition. Grasshopper can also give us visual clues as to what is flowing through the wires. The default setting for these so-called “fancy wires” is off, so you have to enable them before you can view the different types of line types for the connection wires. To do this, simply click on the View Tab on the Main Menu Bar and select the button labeled “Draw Fancy Wires.” Fancy wires can tell you a lot of information about what type of information is flowing from one component to another.

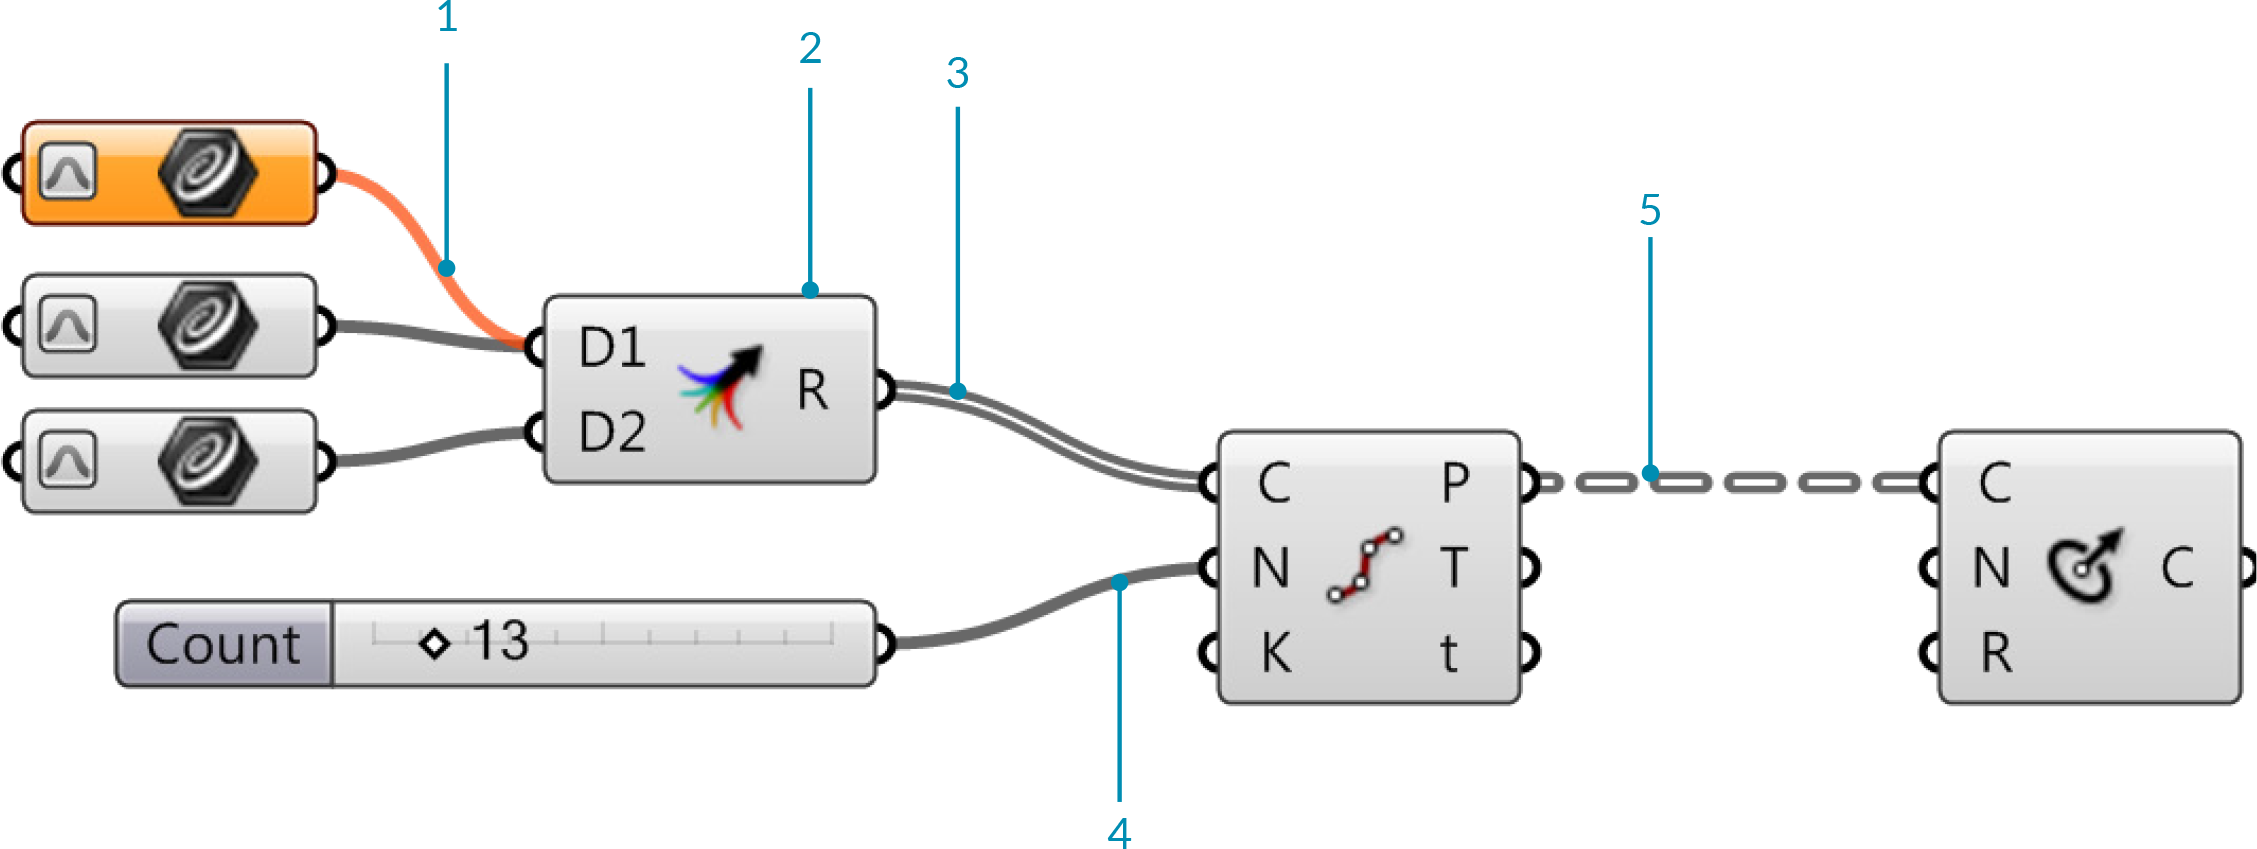
- Empty Item – An orange wire type indicates that no information has been transferred. This parameter has generated a warning message because it contains no data, and thus no information is being sent across the wire.
- The Merge component is an alternative to conecting more than one source to a single input.
- List – If the information flowing out of a component contains a list of information, the wire type will be shown as a grey double line.
- Single Item – The data flowing out of any parameter that contains a single item will be shown with a solid grey line.
- Tree – Information transferred between components which contain a data structure will be shown in a grey double-line-dash wire type.
1.2.4.3. WIRE DISPLAY
If you have spent any great deal of time working on a single Grasshopper definition, you may have realized that the canvas can get cluttered with a nest of wires quite quickly. Fortunately, we have the ability to manage the wire displays for each input of a component.
There are three wire displays: Default Display, Faint Display, and Hidden Display. To change the wire display, simply right-click on any input on a component and select one of the views available under the Wire Display pop out menu.

- Hidden Display – When hidden display is selected, the wire will be completely ‘invisible’. The data is transferred ‘wirelessly’ from the source to the input parameter. If you select the source or target component, a green wire will appear to show you which components are connected to each other. Once you deselect the component, the wire will disappear.
- Default Display – The default wire display will draw all connections (if fancy wires is turned on).
- Faint Display – The faint wire display will draw the wire connection as a very thin, semi-transparent line. Faint and Hidden wire displays can be very helpful if you have many source wires coming into a single input.